PHN0eWxlPgouZGlzY2xhaW1lciB7CmJhY2tncm91bmQ6I2U3ZjJmYTsKICAgIGxpbmUtaGVpZ2h0OiAyNHB4OwogICAgbWFyZ2luLWJvdHRvbTogMjRweDsKICAgICAgYm9yZGVyLXJhZGl1czogMTBweDsKICAgIG92ZXJmbG93OiBoaWRkZW47CiAgICBib3gtc2hhZG93OiAwIDAgMTBweCByZ2IoMCAwIDAgLyAzMCUpOwogIGZvbnQtZmFtaWx5OiBvcGVuLXNhbnMsIGhlbHZldGljYSwgc2Fucy1zZXJpZjsKfQouZGlzLXRpdGxlIHsKYmFja2dyb3VuZDojNmFiMGRlOwogIGZvbnQtd2VpZ2h0OiA3MDA7CiAgICBkaXNwbGF5OiBibG9jazsKICAgIGNvbG9yOiAjZmZmOwogICAgYmFja2dyb3VuZDogIzZhYjBkZTsKICAgIHBhZGRpbmc6IDZweCAxMnB4Owp9Ci5kaXMtdGV4dCB7CiAgICBwYWRkaW5nOiA2cHggMTJweDsKfQouZGlzLXRleHQgYSB7CnRleHQtZGVjb3JhdGlvbjogdW5kZXJsaW5lICFpbXBvcnRhbnQ7Cn0KPC9zdHlsZT4KPGRpdiBjbGFzcz0iZGlzY2xhaW1lciI+CjxkaXYgY2xhc3M9ImRpcy10aXRsZSI+Tm90ZTwvZGl2Pgo8ZGl2IGNsYXNzPSJkaXMtdGV4dCI+VGhpcyB0dXRvcmlhbCBpcyBkZXNpZ25lZCBmb3IgTmlyeW8gT25lIHVzZXJzLiBJZiB5b3UgYXJlIHVzaW5nIE5lZCwgcGxlYXNlIGZpbmQgdGhlIG5ldyBST1MgZG9jdW1lbnRhdGlvbiA8YSBocmVmPSJodHRwczovL2RvY3MubmlyeW8uY29tL2Rldi9yb3MvaW5kZXguaHRtbCIgdGFyZ2V0PSJfYmxhbmsiPmhlcmU8L2E+LjwvZGl2Pgo8L2Rpdj4=
If you’re reading this, you are probably about to dive in the Niryo One ROS stack.
This tutorial aims to help you getting started, so you can get the big picture and know where to start.
We’ll first have a look at the architecture so you can understand what’s going on, and then we’ll see how and where you can get started, depending on your programming level and what you want to achieve.
Note : we won’t teach you how to learn ROS, that’s another topic 🙂
The files, where to install etc
Most of the documentation about Niryo One and ROS is located in our github project. On the main README you can see an overview of the Niryo One ROS stack, and you can navigate on each package’s README to get more details about a specific part of the application.
You can install the stack and start a simulation mode with 3D simulation on your Ubuntu OS, by following the instructions on the github main README.
You can also download the official Raspberry Pi 3B Xubuntu image from here, inside which you can find the complete Niryo One ROS stack already setup, installed, and automatically launched at boot.
The architecture, from hardware control to high level user interface
This picture gives you an idea about the different layers of the application. Let’s start with the bottom (hardware).
The hardware layer is, well, anything that directly deals with hardware. One part of the hardware layer is inside the niryo_one_rpi package (mostly Python). This part is responsible for the top button, the LED, the GPIOs from the panel connector, the Wi-Fi connection, the fans, etc.
The other part is the motor driver, which is basically a running loop providing an interface between ROS and the motor commands. The driver will handle both CAN and Dxl bus for all the robot motors, and ensure that the higher level (control) can send commands to the motors, and receive back the position and errors of all motors.
Then we have the control layer. For this layer we use the ros_control package along with a joint_trajectory_controller. This controller is a position controller :
- Receives a trajectory
- Runs a control loop :
- Receives the current position from the driver
- Interpolates the trajectory (quintic spline) to get the next position command
- Sends the position command to the driver
On top of that, the motion planning layer is responsible for finding inverse kinematics and building a path for the robot. We use the well-known ROS Moveit package for this layer. The path created consists of a series of points. For each point, each axis are given a specific position, velocity, and acceleration. This path is sent to the joint trajectory controller for the actual hardware execution.
The next layer is the commander layer. This is a high level interface between the client (you or another machine) and the underlying robot commands.
It takes commands such as “Move joints”, “Open gripper”. For each command it will do the following :
- Check that another command is not currently running
- Validate command parameters
- Call the motion planning layer if a robot movement is required
- Send the command to the control and hardware layers
This layer is the higher level for the core Niryo One ROS functionalities. When you send a robot command, the command will go through this layer. You can see the commander as a gateway between you and the robot.
On the top of this layer, we finally have the external/user layer. We have developed a set of high level interfaces between the ROS commander layer and the outside. The main 2 goals of those interfaces are : 1. hiding the ROS complexity for users who want to use high level commands, and 2. Providing a way to control the robot from a non-ROS environment (more on that later).
Simulation mode
You can decide to launch the full Niryo One ROS stack on the Raspberry Pi with the following command : roslaunch niryo_one_bringup rpi_setup.launch
This will launch all the packages and functionalities that are required to run the robot.
We have also provided you with a way to run a simulation mode of the robot. This is explained on the github README, you’ll need to run the command : roslaunch niryo_one_bringup desktop_rviz_simulation.launch
So, what are the differences between the simulation mode and the “normal” mode ?
- The hardware layer (+ dependencies for this layer) is disabled. The lower level of the architecture is now the control loop from the control layer. Basically, the command given to the robot is echoed so the trajectory is perfectly executed.
- Rviz will also be launched. Rviz is another ROS tool that enables you to have a 3D view of the robot. You can check out the many options on the left panel to see the different axis, show the trail of one axis on the screen, etc.
All the other functionalities (above the hardware layer) are the same. It means you can both develop on the normal or simulation mode, and all the high level commands (Python API, external communications, etc) will work the same.
How to get started as a developer ?
There are many ways you can get started, by directly diving in the core functionalities code, or simply by using the higher level interfaces.
Here’s a (non exhaustive) list of what you can do :
Develop with the Python API
The Python API is hiding all the ROS complexity of the commander package.
You get to program the robot without having to use or learn ROS, which can be quite useful, both for beginners (easier to start) and advanced users (faster to program).
You can find the full documentation here.
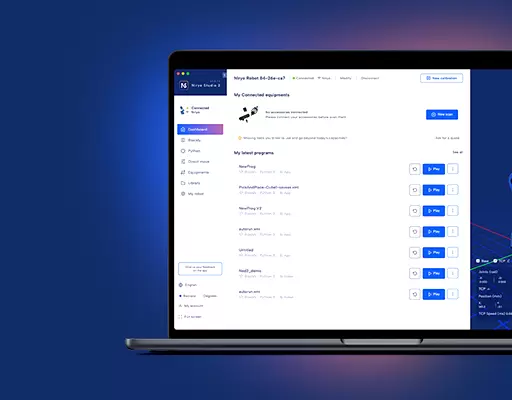
Use the Blockly interface on Niryo One Studio
Although this is not “real programming with code”, this interface makes it very easy and convenient to write programs for the robot, and is also great to teach programming to students. If you have zero programming knowledge, this was made for you. Also, it can be used by advanced users, for the same reasons than for the Python API, simply because all the block functions that you see here are directly calling the Python API.
Use the Modbus TCP/IP server (for Modbus fans)
This server can be used to communicate between a non-ROS system and the Niryo One ROS program. You’ll need to create a Modbus TCP/IP client and use the Modbus functionalities to get data and send commands.
You can find the full documentation here.
Use the TCP server
You can use this server to send plain ASCII commands to the robot. You’ll have to create a TCP client (language of your choice) to talk to the server. Very practical if you want to communicate with Niryo One from your own application.
Documentation is available here. We have also developed a few ready-to-use TCP clients for some programming languages.
Develop with other languages using rosbridge_suite
Rosbridge is a ROS package already installed and running on the Niryo One Raspberry Pi 3 image. This package enables you to communicate between a non-ROS system to a ROS system, through websockets.
You can check the documentation for this package on the ROS wiki. For the client side, you can find multiple libraries developed by the community (roslibjs for javascript, rosjava for java, etc). Those libraries allow you to use ROS communication functionalities (so you need to know how a little bit about ROS) on your non-ROS system (ex : web page, android application)
Develop directly with ROS (if you want to get your hands dirty)
You can also choose to directly use the ROS interfaces (topics, services, actions) to create programs for the robot.
Of course, here you’ll have to know how to program with ROS (which is another story), but this is the nearest you can get from the Niryo One ROS core functionalities.
The code is located in the ~/catkin_ws/src folder. You can find here all the packages developed for Niryo One.
Note that if you are developing on the Raspberry Pi 3B itself, you’ll have to stop the robot program before compiling (too much RAM used for both actions, the Raspberry Pi may freeze).
Also make sure to compile using catkin_make -j2 -l2 on the Raspberry Pi 3, so you only use 2 cores out of 4. Not adding the “-j2” flag may result in a compilation error that has nothing to do with your code, and the execution may also freeze and take a very long time.
Some tips :
- To see all the topic interfaces related to Niryo One : rostopic list | grep niryo
- For more info on a specific topic : rostopic info
- To see all services : rosservice list | grep niryo
- For more info on a specific service : rosservice info (service_name)
- The commander package exposes an action server named “niryo_one/commander/robot_action”, with a “RobotMoveCommand” message. This is probably what you’re looking for if you want to send direct command to the robot using ROS.
Develop on the core Niryo One ROS stack (advanced users)
If you want to modify a behavior on the robot, add a new core functionality, or run your own tests, you’ll need to modify the files inside the Niryo One ROS stack packages
WARNING : Modify the files at your own risks. Especially for hardware related-stuff, we may not be responsible if you damage one part of the robot because you changed a piece of code by yourself.
So, basically, what you have to do is modify the files you want, compile (if needed), and restart the robot program.
I still don’t understand
Well, that’s not a problem ! Maybe we’ve missed a few points or we explained something with too much lingo.
If you feel that one part of this tutorial is not clear or complete, please send us a message at support@niryo.com. We’ll then be able to update this page with better information.
—
Also, if you’ve made a nice tutorial on Niryo One, feel free to share it with us and the Niryo community, and we’ll be happy to link to it from our documentation pages.


