PHN0eWxlPgouZGlzY2xhaW1lciB7CmJhY2tncm91bmQ6I2U3ZjJmYTsKICAgIGxpbmUtaGVpZ2h0OiAyNHB4OwogICAgbWFyZ2luLWJvdHRvbTogMjRweDsKICAgICAgYm9yZGVyLXJhZGl1czogMTBweDsKICAgIG92ZXJmbG93OiBoaWRkZW47CiAgICBib3gtc2hhZG93OiAwIDAgMTBweCByZ2IoMCAwIDAgLyAzMCUpOwogIGZvbnQtZmFtaWx5OiBvcGVuLXNhbnMsIGhlbHZldGljYSwgc2Fucy1zZXJpZjsKfQouZGlzLXRpdGxlIHsKYmFja2dyb3VuZDojNmFiMGRlOwogIGZvbnQtd2VpZ2h0OiA3MDA7CiAgICBkaXNwbGF5OiBibG9jazsKICAgIGNvbG9yOiAjZmZmOwogICAgYmFja2dyb3VuZDogIzZhYjBkZTsKICAgIHBhZGRpbmc6IDZweCAxMnB4Owp9Ci5kaXMtdGV4dCB7CiAgICBwYWRkaW5nOiA2cHggMTJweDsKfQouZGlzLXRleHQgYSB7CnRleHQtZGVjb3JhdGlvbjogdW5kZXJsaW5lICFpbXBvcnRhbnQ7Cn0KPC9zdHlsZT4KPGRpdiBjbGFzcz0iZGlzY2xhaW1lciI+CjxkaXYgY2xhc3M9ImRpcy10aXRsZSI+Tm90ZTwvZGl2Pgo8ZGl2IGNsYXNzPSJkaXMtdGV4dCI+VGhpcyBhcHBsaWNhdGlvbiBpcyBkZXNpZ25lZCBmb3IgTmlyeW8gT25lIHVzZXJzLiBJZiB5b3UgYXJlIHVzaW5nIE5lZCwgcGxlYXNlIGZpbmQgdGhlIG5ldyBkb2N1bWVudGF0aW9uIDxhIGhyZWY9Imh0dHBzOi8vZG9jcy5uaXJ5by5jb20vYXBwbGljYXRpb25zL25lZC9zb3VyY2UvZXhhbXBsZXMvcHJvdG90eXBlX211bHRpcm9ib3RfcHJvZHVjdGlvbl9saW5lLmh0bWwiIHRhcmdldD0iX2JsYW5rIj5oZXJlPC9hPi48L2Rpdj4KPC9kaXY+
INTRODUCTION
Learn to simulate a production line in multi-robot (threading) with this new demonstrator. You will use the Vision Set, the Conveyor Belt, our TCP API and two robots.
REQUIREMENTS
- Two Niryo One
- A Vacuum Pump for the Niryo One
- A Large Gripper
- Red, blue and green pawns
- The Vision Set and a workspace for the Conveyor Belt
- A Conveyor Belt
- A slope from the Education Set
SET-UP
Hardware
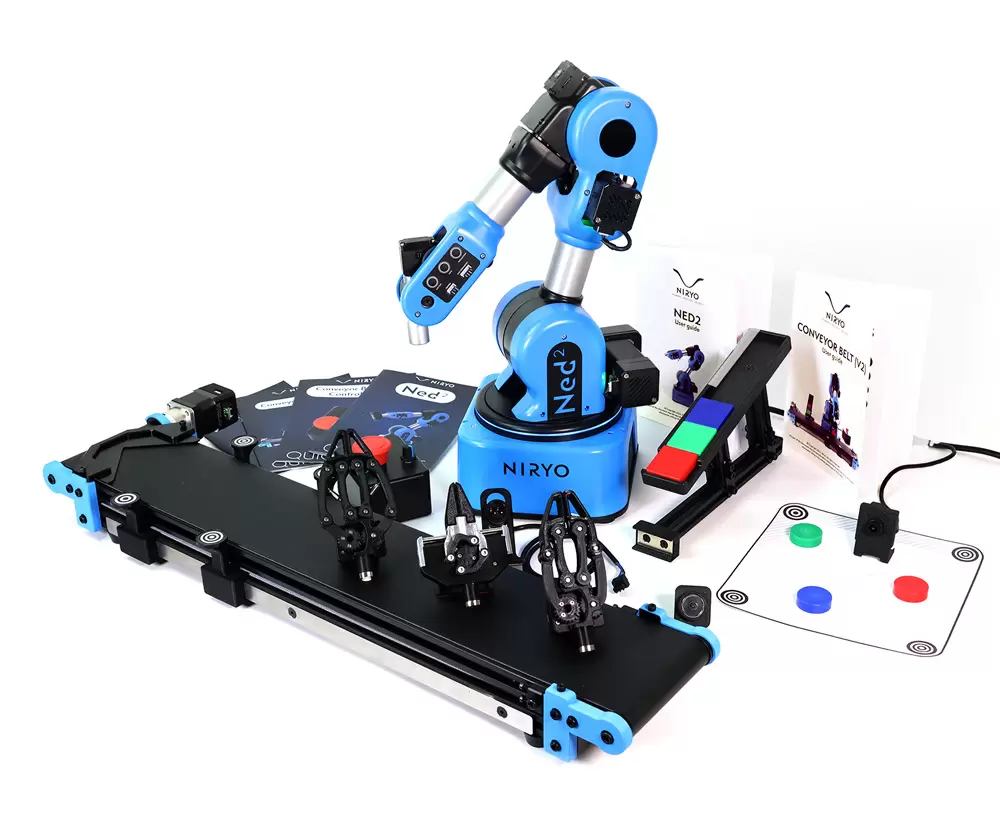
Attach the front of the Conveyor Belt to the Niryo One equipped with the Large Gripper. Then, at the back of the Conveyor Belt, attach the robot with the Vacuum Pump.
Midway between the two robots, set the slope provided with the Education Set and attach the four landmarks of the workspace at the front of the Conveyor Belt as seen on the following picture :
 Finally, calibrate the workspace.
Software
Before launching the program, four variables have to be modified in the robot.py:
- robot1_ip_address =
- workspace1 =
- observation_pose =
- robot2_ip_address =
Then, launch the “python3 robot.py” program.
For the first launch, you need to give five positions to the program with the learning mode (press enter to confirm a position).
In that order:
- Front robot:
-
- A position a few centimeters above the slope
- The position from which the robot can drop the pawn on the slope
- Back robot:
-
- The position from which the robot can grab the pawn at the bottom of the slope
- A position a few centimeters above the previous position
- A position at the middle of the Conveyor Belt where the robot can drop the pawn.
FUNCTIONING
https://niryo.com/wp-content/uploads/2020/12/SchémaMultiThreading-400×473.png
Multithreading allows us to perform several parts of the same program in parallel. You can then perform multiple instructions simultaneously within the same process. The communication of information between the threads is fast and easy, which makes multithreading very practical to control several Niryo One.
The program’s main thread launches a thread for each robot to control. Threads communicate with each other through shared variables and with the class threading.Event().
This helps in organizing interactions between the two robots as well as the control of the Conveyor Belt and the sharing of the slope.
Each thread has an instance of the “NiryoOneClient()” class that allows it to be connected to a robot and to control it.
Threads communicate together through variables located in the mother-class “RobotsMains”.
FEATURES
The learning mode allows you to save positions. To get new positions, enter {–reset}.
The Conveyor Belt speed is adjustable. To do so,it is necessary to change the “conveyor_speed = ” variable.
The distance between the pawns is adjustable. To do so, it is necessary to change the “conveyor_place_interval = ” variable.
The width of pawns’ distribution on the Conveyor Belt is adjustable. To do so, change the “rand drop = ” variable.
LIST OF THE FLAGS
{–reset}
Deletes the saved positions and launches the acquisition of new positions (similar to deleting or renaming the data.txt file).
FAQ
Why does the robot not detect the objects on the Conveyor Belt ? (The Conveyor Belt does not stop).
If the robot does not detect the objects placed on the Conveyor Belt, this might be due to the robot’s camera which cannot see the four landmarks of the workspace. Therefore, adjust the observation pose so the robot can see the four landmarks.
The Conveyor Belt doesn’t stop at the end of the program.
In that case, relaunch the program and stop it again when the Conveyor Belt stops.
Check our Github to get the program to control Niryo Ones with multithreading.