If you received a warning message on Niryo One Studio saying that your Niryo Steppers are not up to date, or if you want to use Niryo Steppers for a different purpose, then this tutorial is what you are looking for.
You can check your current version in the “Settings” part of Niryo One Studio. The latest version number can be found on the download page.
Step 1 : Prepare your Arduino IDE
If you haven’t installed the Arduino IDE, download it and install it from here.
The micro-controller (SAMD type) used in Niryo Stepper is not already included in the supported boards, so you’ll need to add the extension.
Open the boards manager.
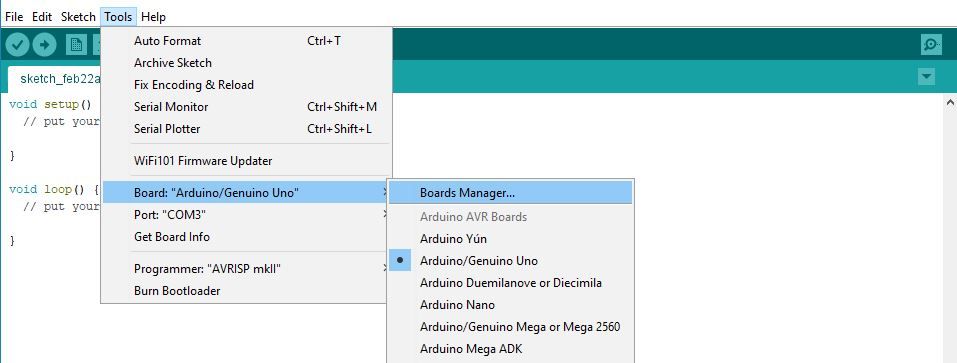
Search for “zero”.

Click on the package and install it. This may take a few minutes.
Once done, restart your Arduino IDE.
Step 2 : Get the Niryo Stepper firmware
Download the firmware from our download page or directly from our github repository (take the latest release).
Extract the archive. If the folder name is not “NiryoStepper”, then rename it and give it this name.
Open the folder, and double click on NiryoStepper.ino. The program will open in your Arduino IDE.
Step 3 : Upload the code for each motor
Now you need to use a microUSB to USB cable to connect a Niryo Stepper to your computer.
Important note: if the Arduino IDE fails to upload the program when connected to a USB 3.0 port, try using a USB 2.0 port instead.
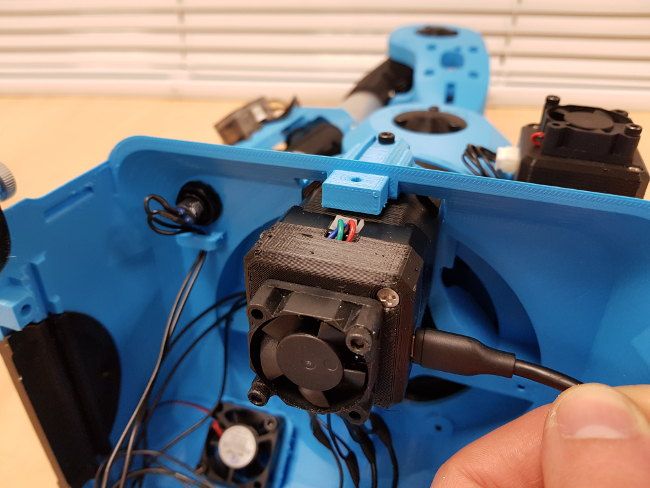
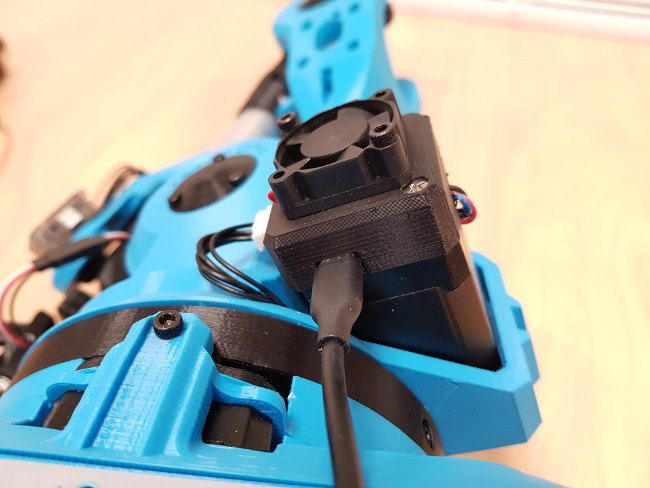
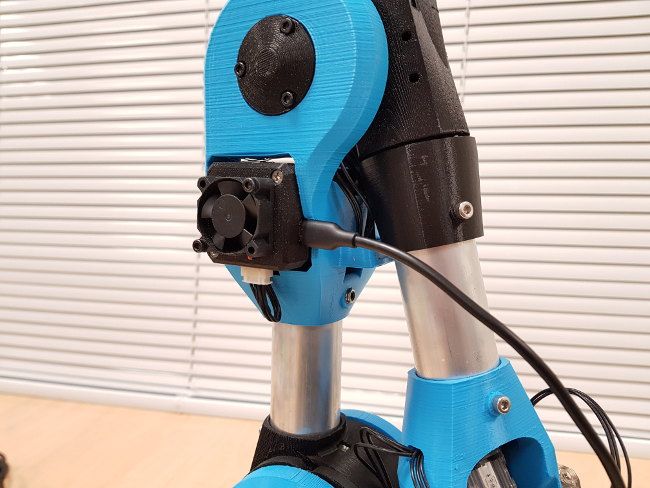
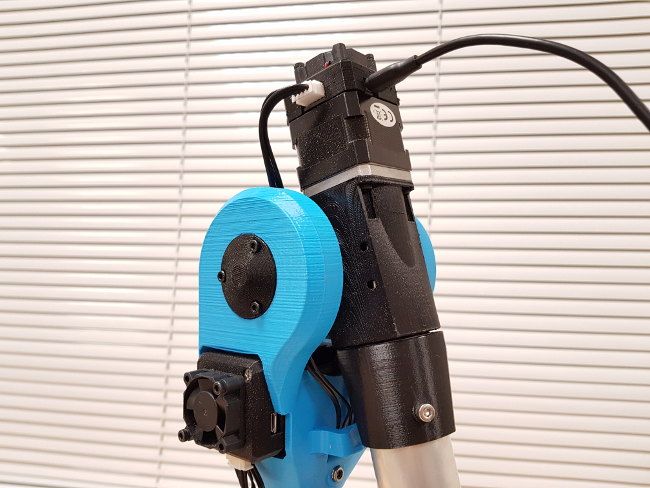
Here is how to connect the microUSB cable to each motor :
Niryo Stepper 1 :
Niryo Stepper 2 :
Niryo Stepper 3 :
Niryo Stepper 4 (only for hardware V1, orders before September 2018):
Before you upload any code, make sure that you follow this instruction :
- Find the line starting with #define MOTOR_ID
- !!! For each motor, you need to put the correct ID before you upload the code. !!! (IDs are 1 for motor 1, 2 for motor 2, etc)
- If you put a wrong ID here, the robot will not work correctly.
- Ex : motor 1 and 2 have same ID, so the robot can’t find motor 1.
- Ex 2 : motor 1 has ID 2 and motor 2 has ID 1 –> this will result in weird movements from the robot.
Let’s start with Niryo Stepper 1 :
Change the motor ID to 1 : #define MOTOR_ID 1
Connect the cable to your computer and :
- Select Arduino/Genuino Zero (Native USB Port) in Tools/boards
- Select your board which is connected to your computer in Tools/port

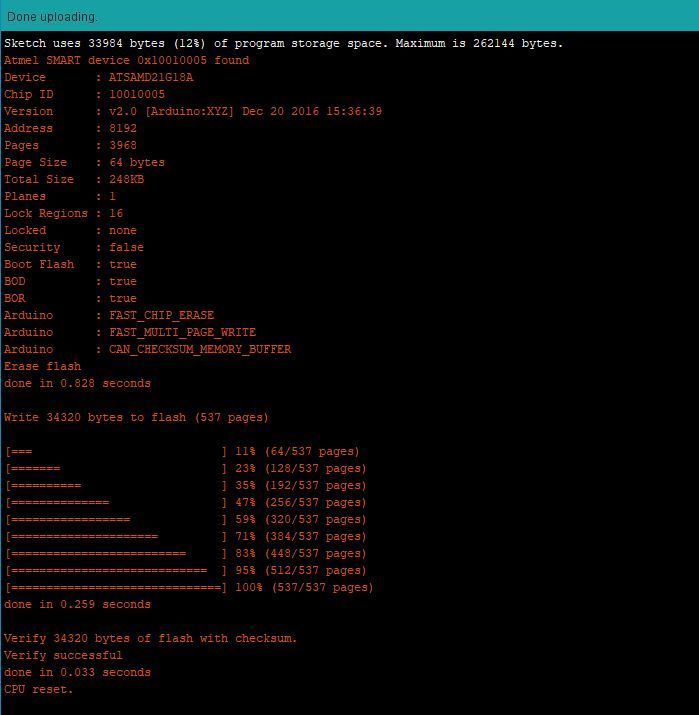
Now click on Upload (top button with an arrow). Wait a few seconds. You should see a message like this at the bottom of the IDE :
Once done, repeat this step for each motor. (don’t forget to change the ID in the code before your upload)
That’s all !
Notes :
- If you were asked to update your Niryo Steppers (from Niryo One Studio), there is a chance that you’ll also need to update your Raspberry Pi image.