

 EN (€EUR)
 Support
  Contact
  My Quote



 Sign in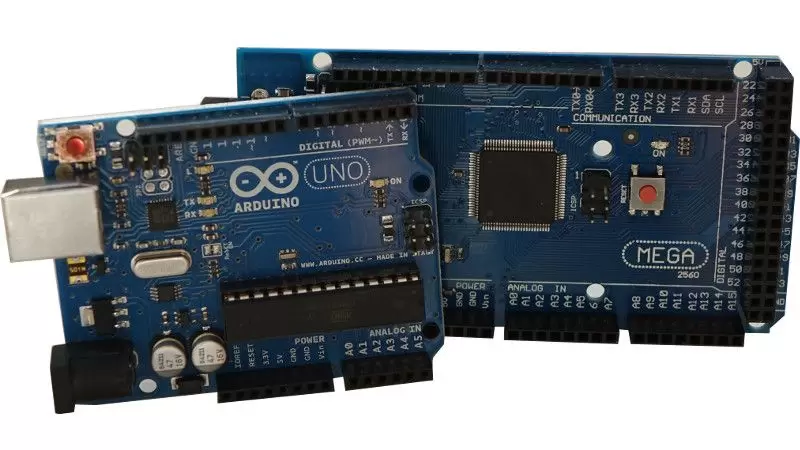

Robotics is such an exciting and growing field, and one of the best ways to get started is by learning to program a robot arm. Whether you’re building from scratch or already know some electronics, Arduino gives you the core building blocks: motor control, sensors, basic logic, that you’ll reuse on more advanced robotics projects.
In this guide, we’ll walk you through the essentials step by step: which board to pick, how to wire and control motors, how to read sensor data, and how to write your first program to move a robot arm. You’ll also find more examples of robotics applications on Instructables, a great resource for open source tutorials.
Once you’re comfortable with these Arduino basics, you may want to move to a more capable platform. Ned2, our 6-axis educational robot arm, can be interfaced with an Arduino board via digital I/O. It’s a natural next step if you want to extend it with custom sensors or actuators while programming in Python or with Blockly through NiryoStudio.
What you can do, and what you can’t do with an Arduino board
An Arduino board is composed of a microcontroller, some LEDs, a reset button, and many pins that you can use for input/output operations. With so many pins available, you can easily read data from sensors, or control different motors and actuators, which is what makes Arduino a great starting point when you want to program a robot arm. It’s kind of an all-in-one tool to interface all the hardware you need to control.
But don’t expect to run artificial intelligence, 3D visualization or other heavy algorithms on it. Microcontrollers aren’t powerful enough for that, and it isn’t the purpose of an Arduino board. Arduino is mostly used for input/output operations and small computations.
Don’t worry though, you can still do amazing stuff with just an Arduino board and a few motors and sensors. There are more than enough resources to learn robotics with Arduino.
And if you want to go further and add an intelligence layer to make your system smarter, you can control your Arduino board from another computer, like a Raspberry Pi board. There are many easy ways to do that.
Choosing an Arduino board
First of all, you’ll need to choose which Arduino board is best suited for your robotics project. Our recommendation: an Arduino Uno is enough if you just want to learn the basics, while an Arduino Mega gives you more digital input/output pins if you’re planning a bigger project with more motors and sensors.
If your project uses several stepper motors, a shield like RAMPS 1.4 makes wiring and power management a lot easier on an Arduino Mega board.
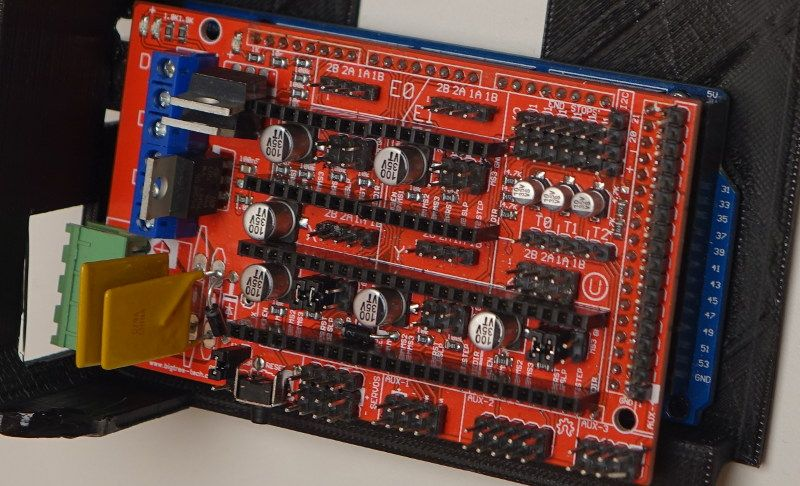
RAMPS 1.4 shield on top of an Arduino Mega board
A few other options exist depending on your needs: the Arduino Nano if you want something smaller, or the Arduino Due if you need more computing power. Once you’ve picked a board, the rest of this guide applies the same way.
Installing the IDE
The first step is to install the software (IDE) that lets you write and upload code to your Arduino board. You can download the Arduino IDE from the official Arduino website. It’s available for Windows, macOS and Linux.

Once installed, plug your Arduino board into your computer with a USB cable. The IDE should automatically detect the port. You just need one extra step: go to “Tools” then “Board” and select the Arduino board you’re using.
Then all you have to do is write your code and upload it. If you’re not familiar with Arduino programming yet, the IDE comes with built-in example sketches (File then Examples) using standard Arduino libraries, which is a fast way to get up to speed.
Controlling motors (output)
As we saw, an Arduino board works as an input/output platform. In this post we’re focusing on robotics applications, so what do you actually need to move a robot arm? Motors.
Two kinds of motors can be easily controlled by Arduino: servo motors and stepper motors.
Servo motors
Servo motors only need a 3-wire connector and can be plugged directly into the Arduino board. Standard hobby servos move between 0 and 180 degrees, and you can control them with the Arduino Servo library. Several examples are available on the Arduino website.
To control a servo motor, you send it the value of the goal angle, and it moves there automatically. You can adjust the speed by incrementing the goal over time.
You can also read the current angle back from the servo, which gives you useful feedback. Keep in mind that most hobby servos only cover a 180 degree range, which can be a limitation for some applications. Alternative servos with a wider range exist if you need one.

A classic hobby servo motor with a 3 wires connector
Stepper motors
Stepper motors work differently. You can’t plug them directly into the Arduino board, you need an additional driver board, or a shield like RAMPS 1.4 if you’re using a Mega. This gives you a much easier and more reliable interface.
To control a stepper motor, you tell it to take one step at a time. So you need to know how many steps make up a full 360 degree rotation. By adding or removing delay between each step, you can slow down or speed up the motor. Examples are available on the Arduino website. A stepper motor generally runs more smoothly than a servo, and it can rotate continuously.

Stepper motor plugged to RAMPS 1.4 shield, with a motor driver
However, stepper motors don’t give you feedback. So if your robot needs to know its current angle, you’ll need to add an encoder or a sensor to detect if the stepper missed steps due to too much load.
Once you’re comfortable with both servo and stepper motors, you’ll be able to choose which one best suits your robot arm. There are other types of motors out there too, but these two cover most beginner projects.
Reading data from sensors (input)
Once you’ve managed to control your motors, you may want your robot arm to adapt its behavior to changes in its environment.
There are plenty of sensors you can use with an Arduino board:
- Optical distance measurement
- Laser detector
- Accelerometer
- Gyroscope
- Magnetometer
- RFID reader
- Thermometer
- Load sensor
- Force sensor
You’ll find libraries, tutorials and datasheets online to help you read and analyze data from any of these. Data acquisition is usually done via serial, i2c or SPI communication.
For example, you could use an IMU (Inertial Measurement Unit), which combines an accelerometer, a gyroscope and sometimes a magnetometer, to control the inclination of your robot arm. Or add a laser detector if you want your robot to detect and avoid collisions with objects and people.
Logging
When you upload code to your Arduino board, it can be hard to know exactly what’s happening while the program runs. You might see unexpected behavior, or your robot arm might not respond at all.
The easiest way to debug or display the state of your program is to use the Serial library. Just call Serial.print() in your code and open the Serial Monitor in the Arduino IDE. This lets you see logs and send manual commands for debugging. If you see garbled characters in the monitor, check that the baud rate matches between your code and the Serial Monitor settings.
Programming a robot arm: putting it all together
Now that you know how to control motors and read sensors, let’s put it all together and write a simple program to move a robot arm.
A basic robot arm is made of several servo motors, one for each joint (base, shoulder, elbow, wrist, gripper). You control the whole arm by setting the angle of each servo in sequence.

This is the same logic behind every robot arm, whatever its size: define a set of positions, move to each one in order, and control the gripper to pick up or release objects. As your project grows, you’ll want to add sensors (to detect objects before grabbing them) and smoother transitions between angles rather than jumping directly from one position to another.
Going further: Arduino and Ned2 working together
For a more advanced example, Niryo built a gesture-controlled pick-and-place demo: an Arduino Nano connected to a PAJ7620 gesture sensor reads hand movements and sends commands to Ned2 over digital I/O, while the robot’s motion sequences are programmed in Blockly through NiryoStudio.
Moving beyond Arduino: programming in Python
Arduino code (in C/C++) is great for learning the basics, but as your robot arm project grows, you may want more flexibility. This is where Python comes in.
Python is widely used in robotics because it’s easier to read, has a huge ecosystem of libraries, and lets you add more advanced logic like computer vision or path planning. On Ned2 for example, you can program the robot arm directly in Python through NiryoStudio, Niryo’s software, without needing to manage low-level motor control yourself.
If you’re coming from Arduino, the concepts you’ve learned (defining positions, sequencing movements, reading sensor data) carry over directly. Python just gives you a more powerful language to build on top of them.
Ready to program your own robot arm
We covered the basics of programming a robot arm with Arduino: controlling motors, reading sensors, and writing your first motion code. If you get stuck along the way, the Arduino online community is very active and a great place to find help.
If you enjoyed this and want to go further, take a look at Ned2, our 6-axis robot arm designed for learning and experimenting with robotics.


