
 Contact


 Sign in
 How to update Ned2
This version is designed to improve the performance, stability and overall user experience of your Ned2.
From now on it’s considered our robot’s new operating system for future improvements.
After this last manual update you can update the next ones directly from NiryoStudio.
Backup your files
Before updating, please make sure you have downloaded all programs, trajectories, etc…
from your robot to your computer. To do so, you have 3 possibilities:
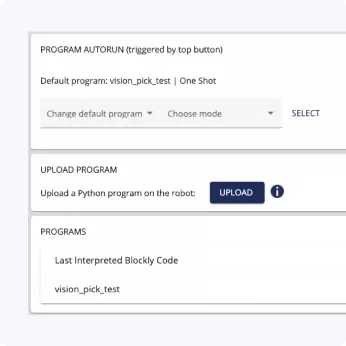
First Possibility
Form previous version of Niryo Studio,
you can go to your program list and download all your previous programs
You can download all your robot files via ssh before removing the SD card
by using this command:
Unset
scp -r niryo@[Your_robot_IP_Adress]:niryo_robot_saved_files [Your destination folder] You can remove the SD card from your robot and download all your saved files from the Writable partition on your computer following this
  root: writable/home/niryo/niryo_robot_saved_files
or usea terminal command. 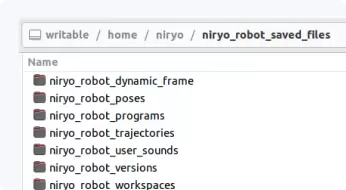
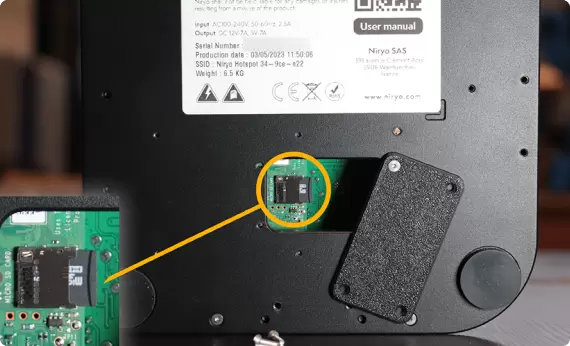
Flash your Ned2 SD card
To complete this tutorial, you will need:
The smallest Allen key
The microSD-to-USB adapter from the bag supplied with your robot.
Remove the micro SD from the raspberry PI
Download the image on the download center page.
This way, you’ll guarantee that you’ll get the latest version.
Use any pre-installed software (or install any of them) to extract the archive.
The size of the image is about 5 GB.
Plug the microSD card (with the adapter) to your computer.
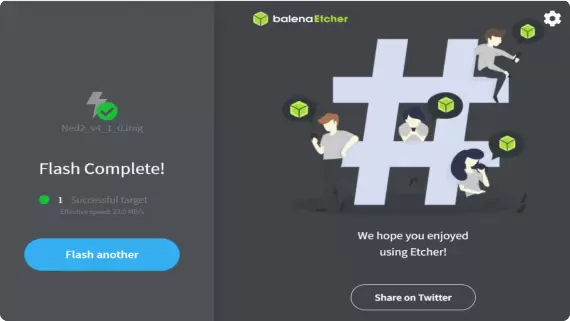
You need a software in order to flash the image into your microSD card. We recommend you to use Etcher, which is easy to use and
Windows/MacOS/Linux compatible.
Launch the software (no installation needed, just unzip and click on the executable inside the folder), select your image (make sure to select the unzipped image, not the archive), select your microSD card and click on “Flash!”.
This may take several minutes.
Enjoy with NiryoStudio 2 !
Congratulations, you have updated your robot and you can now use it with the last version of NiryoStudio.


