This tutorial will help you if :
- You can’t calibrate one or multiple axis of the robot (the motor doesn’t stop when reaching the end of the axis)
- OR you can calibrate the robot but after that it moves in a weird way, stops randomely, etc.
- AND you’ve checked that the belts are all correctly tensed
- AND you’ve checked that the timing pulleys on the stepper motors are correctly fixed
In this case you might have a problem with one of the Niryo Stepper magnet.
First of all, find out which motor is faulty. You can test each motor separately by giving a Move Joints command in Niryo One Studio. If a move command is not working (aborted, canceled, …) or if the calibration can’t pass and you have correctly tensed all the belts, then locate which axis has a faulty motor.
Step 1 : Totally power off the robot
Make sure that you have powered off the robot and unplugged the power adapter. If you try to open the motor while it’s working, you may permanently damage the motor and/or the robot.
Step 2 : Open the motor
Unscrew the motor’s fan.
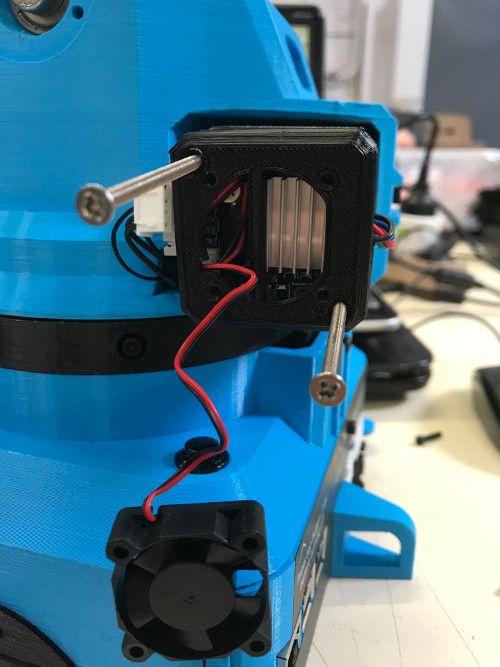
Now remove the plastic cover containing the PCB.
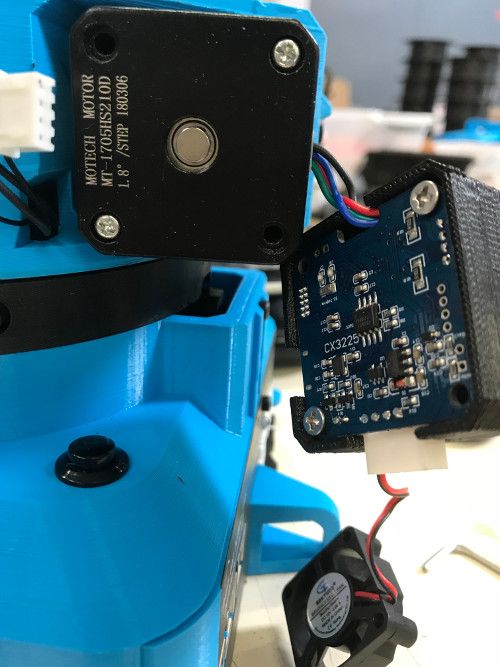
Step 3 : Check the magnet position
The magnet should be in the center of the shaft (like in the previous photo). If it’s correctly centered, then you can stop there and put the plastic cover and fan back.
If it’s not the case, the magnet is not correctly placed and you’ll have problems when running the robot.
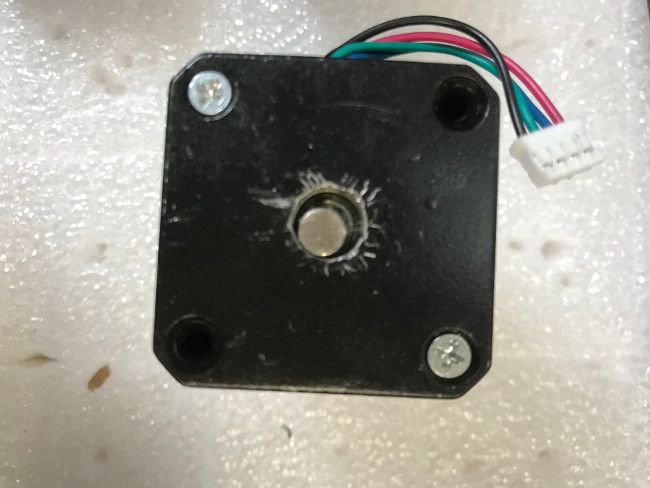
Step 4 : Remove the magnet and clean the shaft
Use a tool like a screwdriver to remove the magnet.
You’ll also need to clean the shaft.
Step 5 : Put the magnet back
Now that the shaft is clean, place the magnet at its center, and use some strong glue to fix its position.
Make sure that the magnet is correctly centered and fixed, or else you’ll still have some problems.
Once that the magnet is fixed in the middle of the shaft, you can put the plastic cover and fan back.